Breaking News
Main Menu
Microsoft Word Margins For Mac
вторник 11 сентября admin 57
Document formatting can be a point of contention for many companies, schools, and publications, so knowing how to set up your documents to match those requirements is important knowledge to have. One common formatting requirement is related to the document margins, and a popular choice is to set all of the document margins at 1 inch. Fortunately all versions of Microsoft Word allow you to manually adjust your margins to 1 inch, including Word 2011 for Mac. Our guide below will show you where to find this setting in the program so that you can switch the margins to 1 inch.
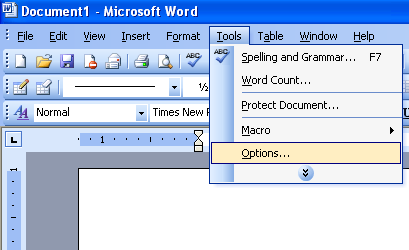
In Word for Mac OS X, to change the margins of an entire document, from the Format menu, select Document. In the resulting window, click the Margins tab. Change the values in the boxes by entering new numbers or by using the up and down arrows. The page layout includes margins, paper size and paper source. Step Click 'File' and then 'Page Setup' menu on the top of the Microsoft Word screen while inside the document you are working with.
Download mac os x tiger. Question: Q: Windows Media Player on Mac OS X Tiger. I recently downloaded Windows Media Player onto my Macbook in hopes of being able to upload music from my Sandisk Sansa Mp3 player to my harddrive, but the program only plays video files, and doesn't even recognize that something is attached when I plug the Sanza into one of the USB ports. Windows Media Player is a free software media player used for playing audio and video on personal computers running Microsoft Windows. Microsoft has also made available versions for other operating systems including Pocket PC, Mac OS, and Solaris. Editions of Windows Media Player were also released for Mac OS, Mac OS X and Solaris, but have since been discontinued. In addition to being a media player, Windows Media Player includes the ability to rip music from and copy music to compact discs, synchronize content with a digital audio player (MP3 player) or other mobile devices, and let.
Use 1 Inch Margins in Word 2011 for Mac The steps in this article will show you how to use 1 inch margins for a document that you create using Microsoft Word 2011 for Mac. You can also using a similar method.
If you wish to adjust the default margins for any document that you create in Word 2011, then check out our tip at the end of this article. • Open your document in Word 2011 for Mac. • Click the Layout tab at the top of the window. • Click the Margins button, then click the Normal option at the top of the list of options. You can also choose to manually set the margin values by clicking inside each of the margin fields and changing the value to 1.
Note that following these steps will only change the margins to 1 inch for the current document. If you wish to change the default margins to 1 inch in Word 2011, then you will need to click Format > Document at the top of the screen, then adjust the margins and click the Default button at the bottom-left corner of the window. Do you need to share your Word document with someone that does not have Microsoft Word installed on their computer? And make it easier for more people to open your document.
Microsoft Word is a word processing application developed by Microsoft and first released on the Mac in 1985. The word processor differentiates itself from text editors like Notes by providing a more powerful platform with advanced features such as spell checking, embedding objects like charts, inserting pictures and even merging data from databases. A key characteristic of modern word processors is the what-you-see-is-what-you-get (WYSIWYG) interface that matches the screen to the final product printed on the page, making it much easier to know how the end product will appear. • Go to in your web browser and sign into your account. (If you do not have an account, you will need to create one.) • If you haven't purchased Office, click the Buy Office 365 button in the top-right corner of the screen. • If you already have purchased Office, click the Install Office button right next to the Buy Office 365 button. • Once the download is complete, open your Downloads folder.