Breaking News
Main Menu
Best Disk Format For Virtualbox Mac
понедельник 14 января admin 13
[Guide] Convert VirtualBox VDI to Parallels Disk Format in Mac, Easy Steps. Without any doubts, Parallels for Mac is the best desktop virtualization software to.
Yes,, you are right: those are the steps, but if you want to end having back a vmdk hard disk (maybe you are interested in using the disk in vwmare too) you miss one more step. So the complete howto is: VBoxManage clonehd 'source.vmdk' 'cloned.vdi' --format vdi VBoxManage modifyhd 'cloned.vdi' --resize 51200 VBoxManage clonehd 'cloned.vdi' 'resized.vmdk' --format vmdk The above will resize the hard disk up to 50GB (50 * 1024MB). To complete things you need to resize the drive too! To achieve this, you might want to download iso and boot from that iso to resize your drive (select the iso from within the virtualbox settings). If your new size is too small, you'll get the same error even with your new vdi file. Since this is a vmdk file, you could use VMWare's vdiskmanager, if it's available for your platform.
VMWare has x86 Linux, Windows, and OS X versions. And then you just do: 1023856-vdiskmanager-windows-7.0.1.exe -x 30720M Machine-disk1.vmdk It avoids having to clone, then expand the disk. Now, the downside is you need the extra tool, and vmdk is VMWare's disk format, and you're still using Virtualbox, so there could be incompatibilities. Qemu-img might also work, but I'm not sure if it supports resizing vmdk files. It would look something like: qemu-img resize Machine-disk1.vmdk +8G And just a reminder, with both, you still have to grow the partition after resizing the underlying disk. All these tools are essentially dd if=/dev/old_disk of=/dev/new_disk bs=16M. As mentioned in the by Luca the required steps are: • Clone the VMDK image to VDI format VBoxManage clonehd 'source.vmdk' 'cloned.vdi' --format vdi • Resize the VDI image VBoxManage modifyhd 'cloned.vdi' --resize 51200 • Clone back to VMDK format VBoxManage clonehd 'cloned.vdi' 'resized.vmdk' --format vmdk Step 3 is optional if you can use a VDI image instead.
All these steps can be carried out in the VirtualBox graphical user interface as well, under File -> Virtual Media Manager. Select the drive you want to clone, and then choose Copy. A dialog opens that allows you to choose the disk format and options. To resize a VDI image, just use the slider in the bottom (click on Properties if it's not visible). Finally, you may need to change the disk size in the guest OS as well: • Run the guest OS and resize the disk partition(s). If you are running Linux, you can use gparted or kparted.
Tried all the solutions here, but nothing seemed to work. After hours of digging I found this post and like magic everything works. I had to make little adjustments so here is the modified version. Tested with Docker version 17.06.0-ce, build 02c1d87. Once developers really start containerising their applications, they often generate a large number of images and quickly fill up the 20GB hard drive space allocated to the Docker virtual machine by default. To make sure the Docker virtual machine has plenty of disk space, we should resize /dev/sda1 to a number that is more reasonable. • Stop the Docker virtual machine docker-machine stop default.
• Boot2Docker package installer ships with a VMDK volume, which VirtualBox’s native tools cannot resize. In order to resize the Docker disk volume, first clone the VDI volume from the default VMDK volume vboxmanage clonehd /full/path/to/disk.vmdk /full/path/to/disk_resized.vdi --format VDI --variant Standard. • Resize the newly cloned VDI volume to the desired capacity.
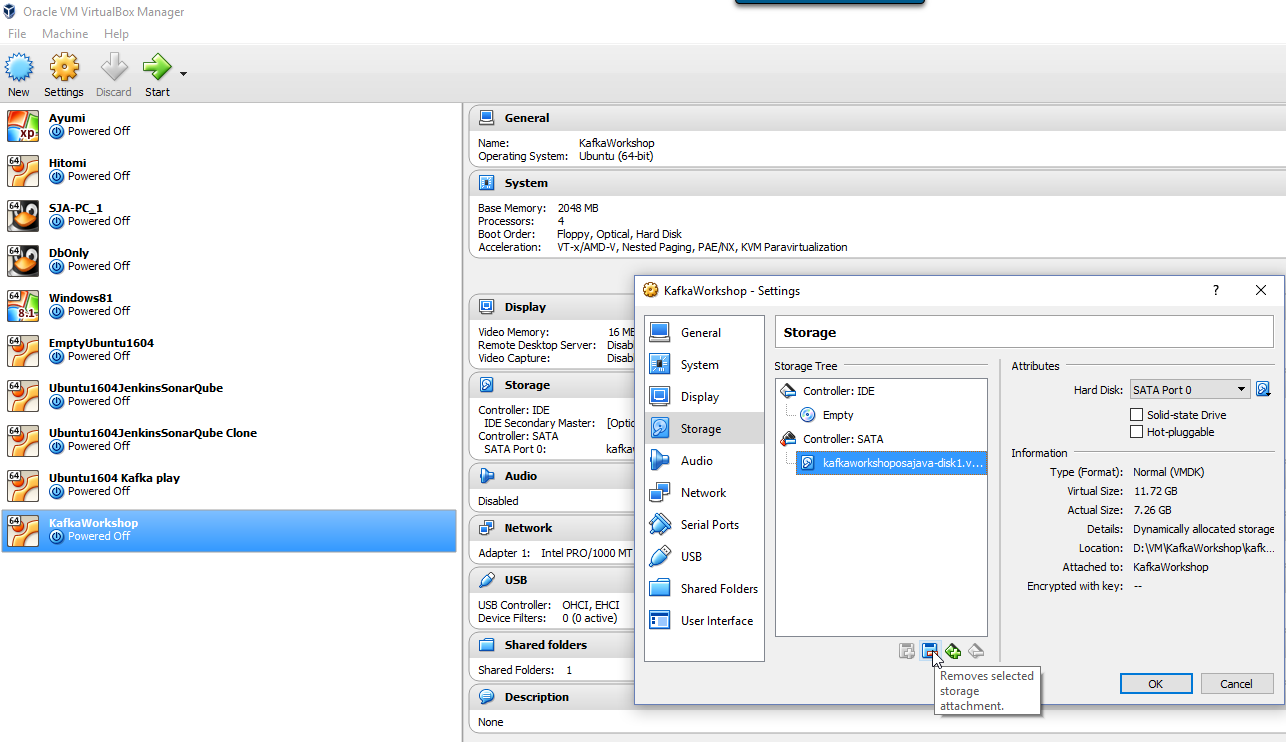
We recommend at least 64GB vboxmanage modifyhd /full/path/to/disk_resized.vdi --resize. • Launch the VirtualBox application, select default VM and click on the “Settings” gear on top. • Click on the “Storage” icon.
Remove the default VMDK volume. How to select an operating system and install noobs for raspberry pi on your mac. • Add a new IDE controller.
• Mount the GParted ISO via the “Add CD/DVD Device” option. • Mount the cloned VDI volume via the “Add CD/DVD Device” option.